Free Guide: How to Set Up and Optimize Your First ASIC Miner for Maximum Profitability
Stepping into the world of ASIC mining is an exciting journey toward financial sovereignty and supporting decentralized networks. However, the transition from curious observer to active miner involves a steep learning curve. Unlike a standard consumer appliance, an Application-Specific Integrated Circuit (ASIC) miner requires specific environmental conditions, high-voltage power, and precise software configuration to operate efficiently. This guide will walk you through the entire process, from unboxing your unit to tweaking its settings for maximum ROI.
1. Unboxing and Physical Inspection
Before you plug anything in, a physical inspection is mandatory. ASIC miners are often shipped internationally and endure significant vibration during transit. Open the box carefully and inspect the unit for any visible dents or loose components.
One of the most common issues is loose heatsinks. Gently tilt the miner from side to side; if you hear a "clinking" or "rattling" sound, it’s likely that a heatsink has detached from a chip. Do not power on the miner if you hear loose parts, as this can cause a short circuit and permanently destroy the hashboard. If the unit looks solid, check that all internal fan cables are securely plugged into the control board.
2. Power Requirements and Electrical Safety
This is where most beginners make their first mistake. Modern ASIC miners, such as the Antminer S19 or Whatsminer M30 series, require significant power—often between 3,000W and 3,500W. Standard US household outlets (110V/120V) are generally insufficient for these machines.
Most professional miners run on a 220V/240V circuit. This is more efficient and draws half the amperage compared to 110V, reducing the heat generated in your wiring. You will likely need a NEMA 6-20R or L6-30R outlet installed by an electrician. Always follow the 80% rule: if your circuit is rated for 20 amps, do not exceed a continuous load of 16 amps.
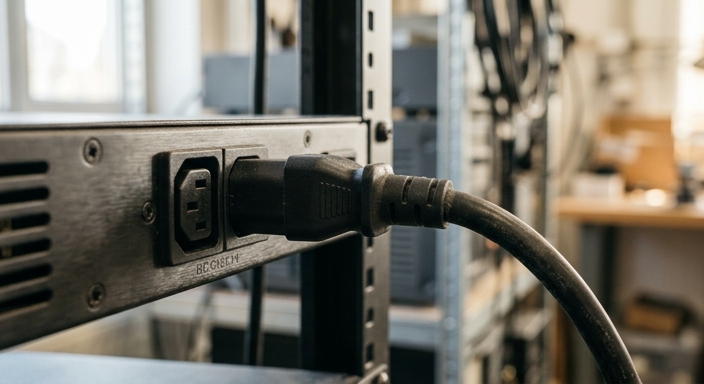
Ensure you are using heavy-duty power cables (14 AWG minimum, preferably 12 AWG for higher wattage). Avoid using standard household extension cords or power strips, which are fire hazards in a mining environment.
3. Connecting to the Network and Finding Your IP
ASICs do not use Wi-Fi. You must use a hardwired Ethernet connection for stability. Once the miner is powered on and connected to your router, it will automatically seek an IP address via DHCP. However, since the miner has no screen, you’ll need to "find" it on your network.
Download a tool like BTC Tools or use the manufacturer’s utility (like Bitmain’s IP Reporter). Alternatively, you can log into your router's admin panel and look for a newly connected device often labeled "Antminer" or "Whatsminer." Once you have the IP address (e.g., 192.168.1.50), type it into any web browser on the same network to access the miner's dashboard.
4. Configuring Mining Pool Settings
Once you are inside the dashboard (default login is usually root / root or admin / admin), you need to point your hashrate toward a mining pool. Mining solo is virtually impossible for a single ASIC, so joining a pool ensures you receive consistent payouts.
In the "Miner Configuration" or "Settings" tab, you will see fields for Stratum URLs. You should enter at least three URLs (Primary, Secondary, and Tertiary) to ensure that if one server goes down, your miner automatically switches to another. Use the format WorkerName.ID. For example, if your pool username is "JohnDoe," you might name your first miner JohnDoe.001.

5. Optimization: Overclocking and Underclocking
Optimization is the key to maximum profitability. Depending on your electricity costs, you may choose one of two paths:
- Overclocking: If your electricity is very cheap, you can increase the voltage and frequency to get more Terahash (TH/s) out of your machine. This increases revenue but also increases heat and wear.
- Underclocking (Efficiency Mode): If electricity is expensive, reducing the power draw often yields a higher net profit even if the total hashrate drops. This makes the miner run cooler and last longer.
Many modern miners have "Low Power" or "Normal" modes built-in. For advanced users, third-party firmware like Braiins OS+ or VNish can provide autotuning capabilities, which adjust individual chip frequencies to find the "sweet spot" of efficiency for your specific hardware.
6. Long-term Maintenance and Monitoring
An ASIC is a heat-generating beast. Dust is your greatest enemy. Every 3-6 months, you should use compressed air (or an electric duster) to blow out the intake and exhaust fans. Watch your temperatures closely: most miners should stay below 80°C (176°F) on the PCB and 95°C (203°F) on the chips.
Use monitoring software like Foreman or Awesome Miner to track your fleet. These tools can send you alerts if a fan fails or if the hashrate drops, allowing you to fix issues before they eat into your profits.
7. Frequently Asked Questions (FAQ)
It is not recommended. ASIC miners produce noise levels between 75-85 dB (equivalent to a vacuum cleaner) and generate immense heat. They are best suited for garages, basements, or dedicated mining sheds with proper ventilation.
The miner will stop hashing and wait for a connection. Most miners have an "auto-restart" feature that will resume mining as soon as the network is restored.
With proper cooling and maintenance, an ASIC can last 3 to 5 years. However, they often become "economically obsolete" before they physically break, as newer, more efficient models make older ones unprofitable.